How to Password Protect a Word Document

This short blog post will teach you how to password protect a Microsoft Word Document on both Windows and Mac.
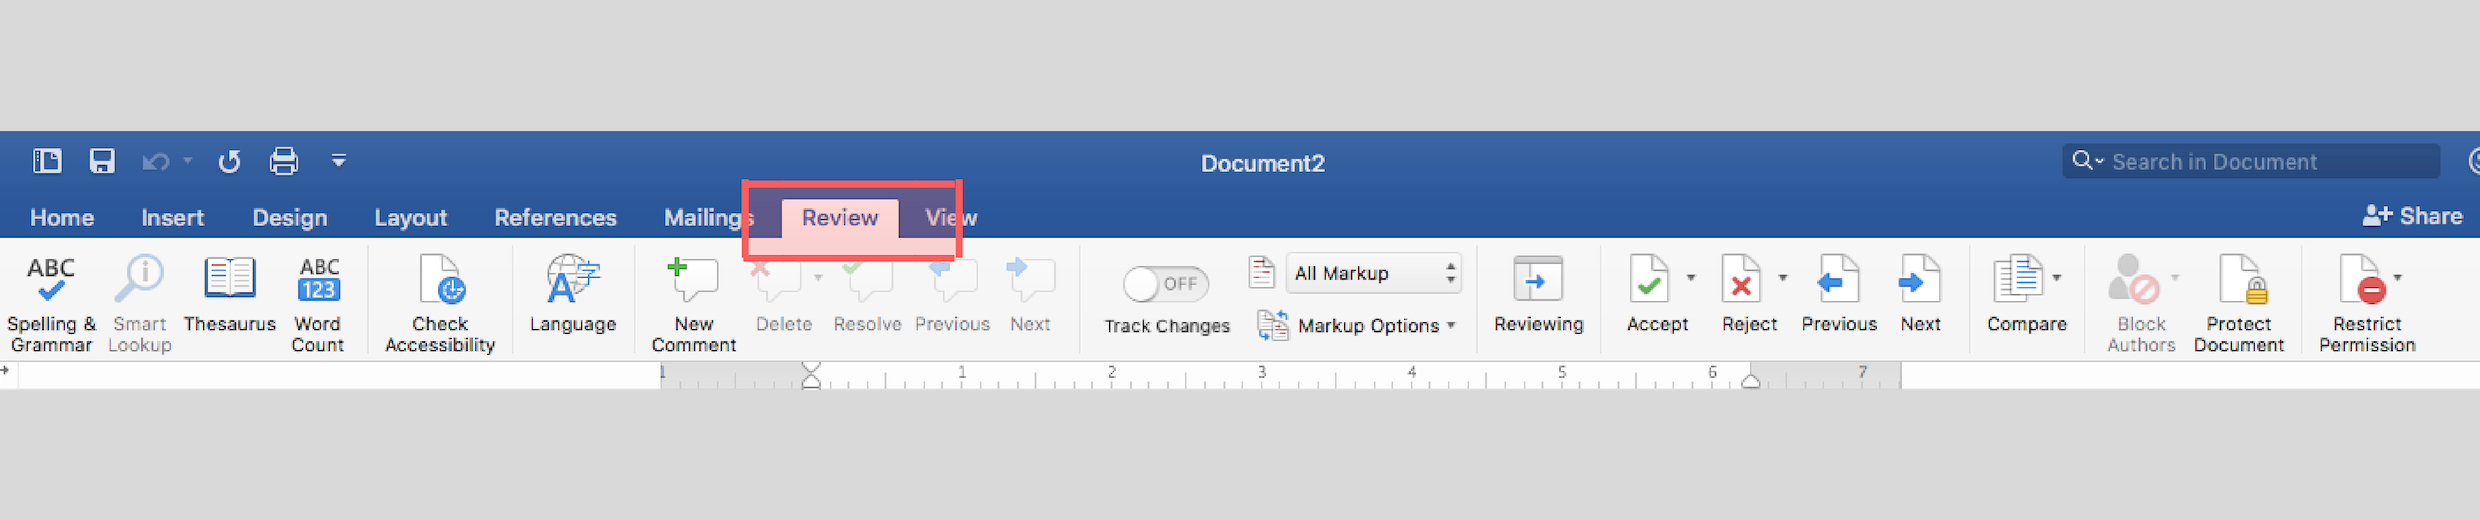
1) Open word document and click the ‘review’ tab
You can do this before you have written the document or once it’s fully completed. It is necessary to have your word document in full screen to see this view of the ‘tabs’ panel. When you have selected the ‘review’ tab, the selection of tools in the screenshot below will appear.
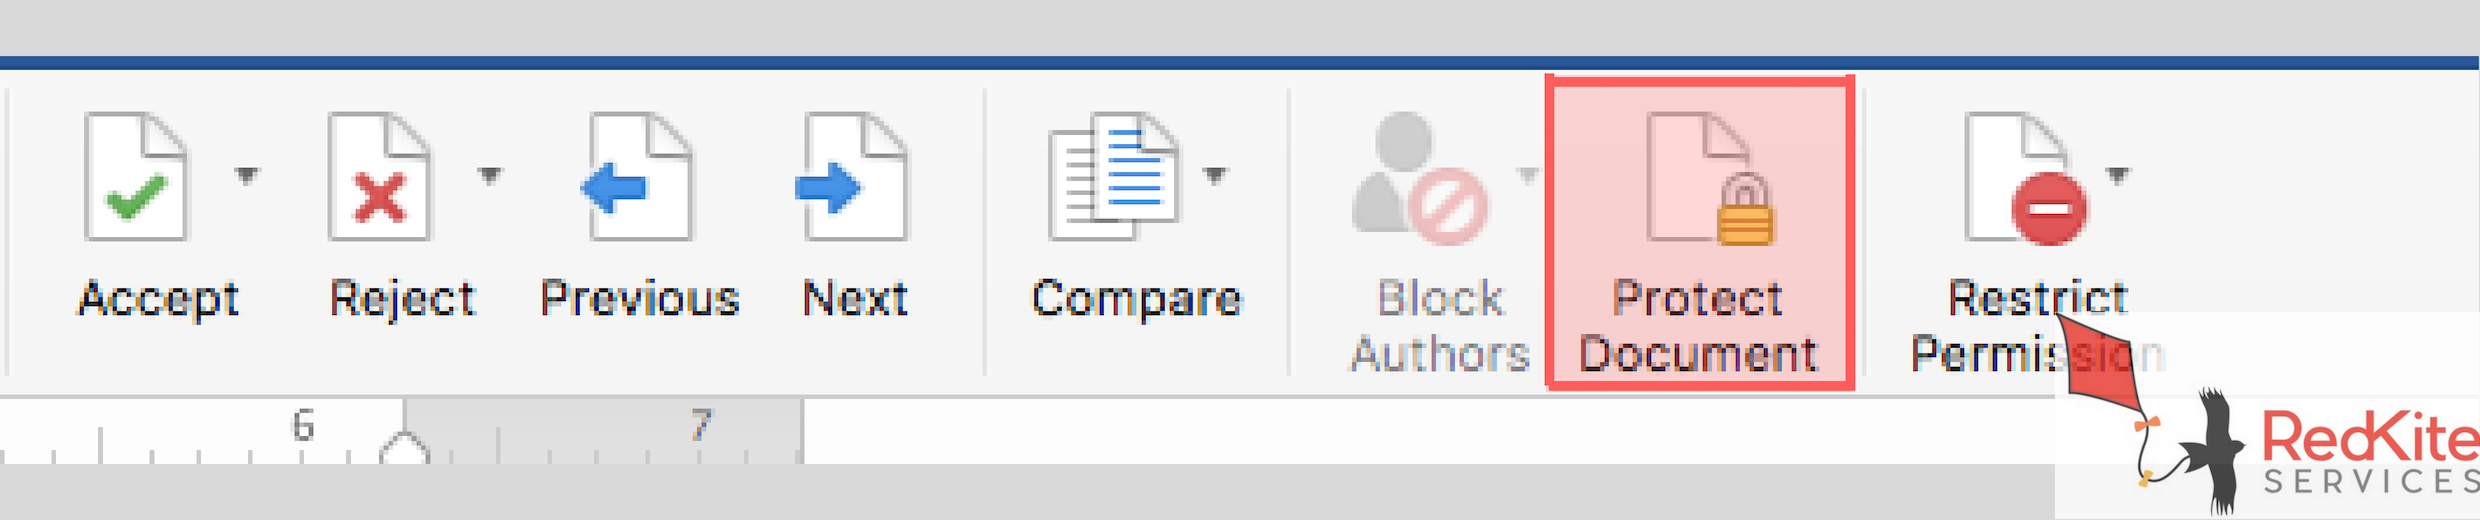
2) At the right of the ‘Review’ tab click ‘Protect Document’
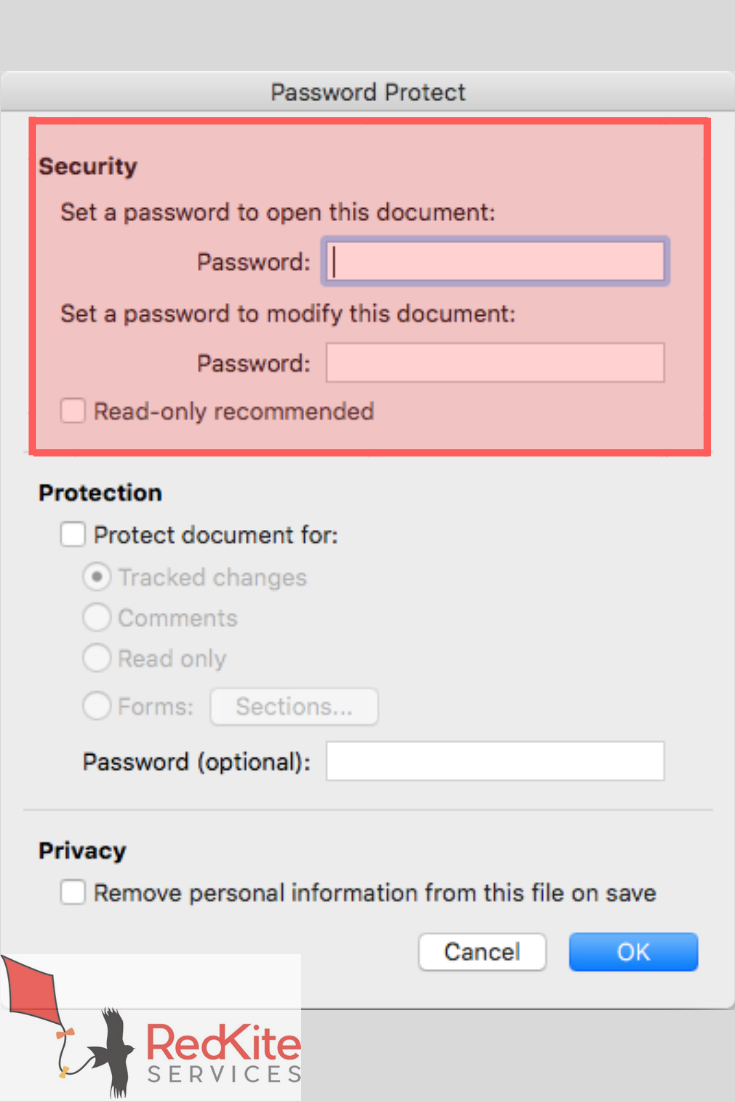
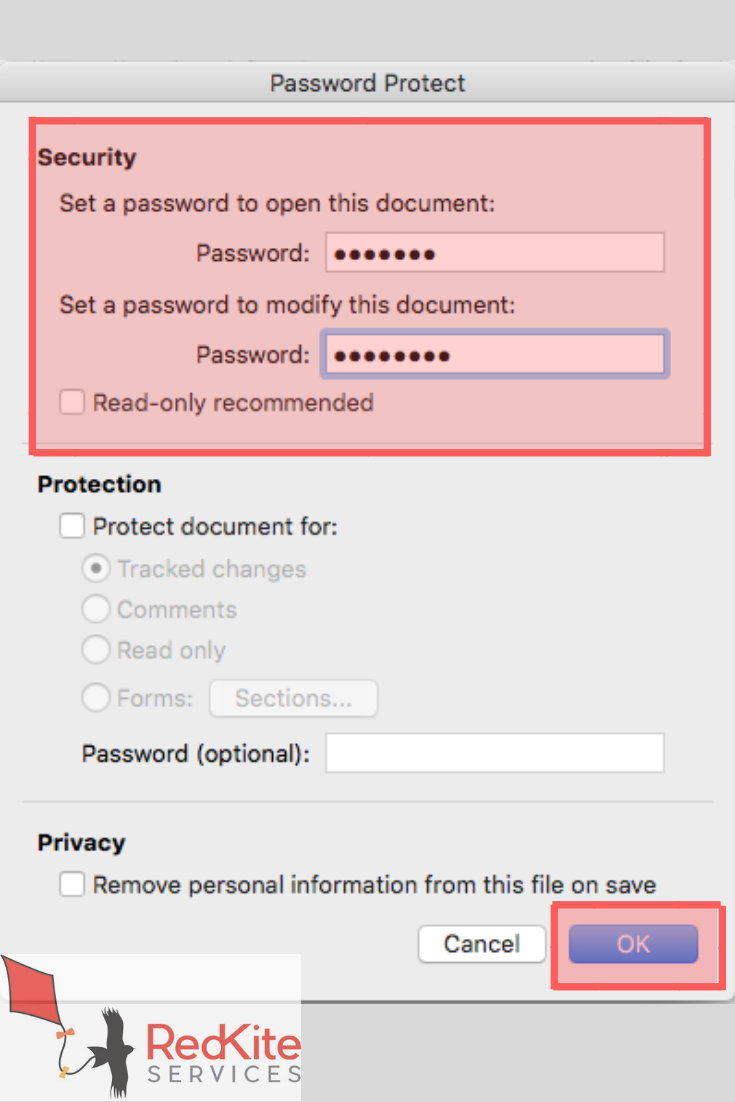
3) Set a password
This dialogue box will appear when you have selected the ‘protect document’ tool. To protect your document, set a password in this dialogue box.
There are two options; a password to open the document, and one to be able to modify it. This may be useful if you have to share your private document with someone who you don’t want modify it. In this case, the password to open the document can be given.
4) Enter password(s) and click ‘Okay’
5) Now re-enter your password and click ‘okay’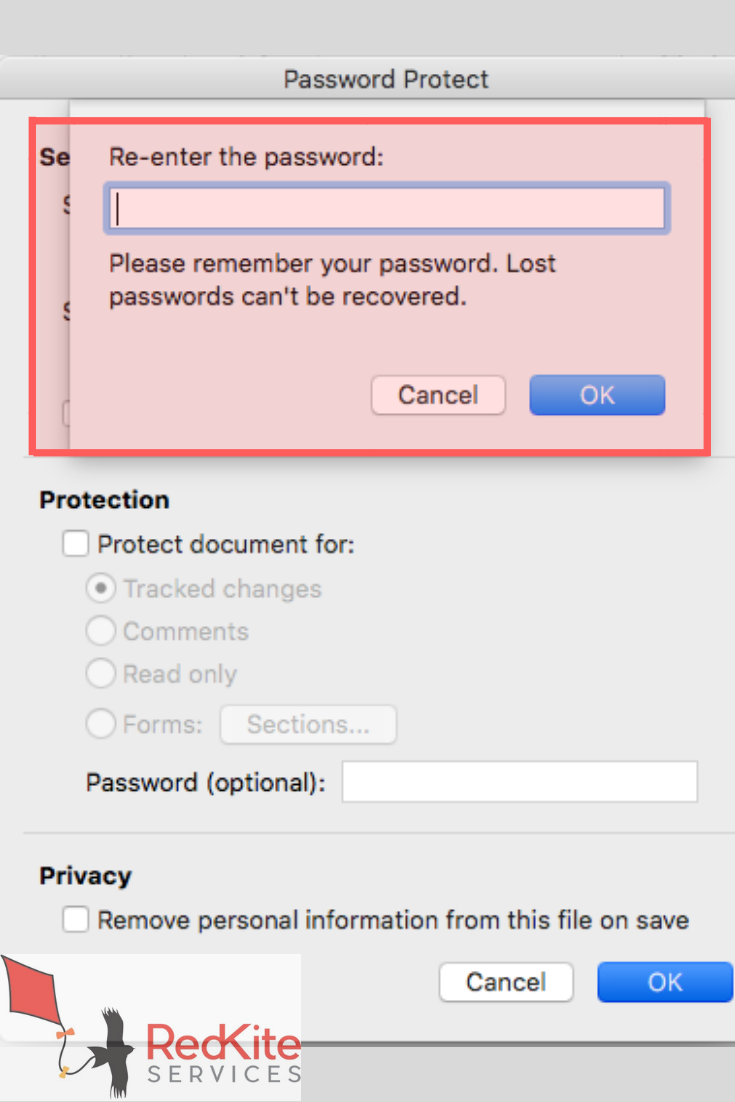
Following these 5 easy steps you have learned how to password protect a word document. This means that the only people able to access it will be those you share the password with.
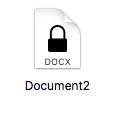
Search icon of a locked document
When searching for your password protected word document, this icon will appear.
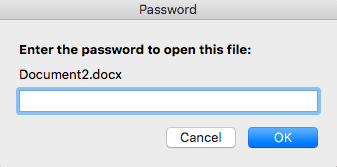
This dialogue box will appear asking for the password to open the file.
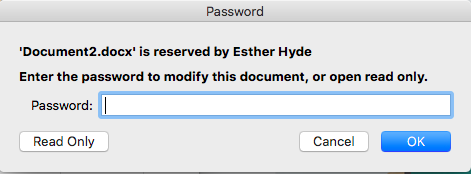
Once you click okay, if you have chosen to have a password to modify the document, enter it here. From this dialogue box you can enter a read only version of the document.
If you don’t have Microsoft Word you can purchase it from Microsoft in a package that suits you: https://products.office.com/en-GB/compare-all-microsoft-office-products?tab=1
If you are a student or teacher your education provider will provide a free download.